Photoshop Color Correction for Product Renders by Greg Geffert

After rendering and importing EXR files into Photoshop I have a workflow that largely uses image masks for colour correction. But first I need to prep the Photoshop file.

  1. First, the Vray 'Multimatte' element layer(s) are converted into alpha channels that can be used in object/material selections.

  2. Second, Vray element mattes of ground reflections and shadows are used to separate them from the product. This allows the ground to be toggled on/off by the packaging and web designers as needed.

  3. Third, the file is converted from 32bit to 16bit RGB as many Photoshop tools are not available in 32bit.

  4. Fourth, additional Vray layers such as object reflections and refractions are changed from normal to 'linear dodge' mode. Placed above the product image these layers are something like a supercharged 'levels' or 'exposure' filter.

  5. Last, products that have transparent pieces like a carafe or jar have their layers moved to a Photoshop group and the transparency copied and applied to the group as a layer mask. The transparency in the product layer is removed with a Photoshop script that copies and merges the layer on top of itself several times. Using a layer mask allows adjustments to the transparency without conflicting with other colour corrections.

Here is an example of a Photoshop layer stack:

The product layer and colour corrections are within a group that has a transparency mask applied to it.

layergif.gif

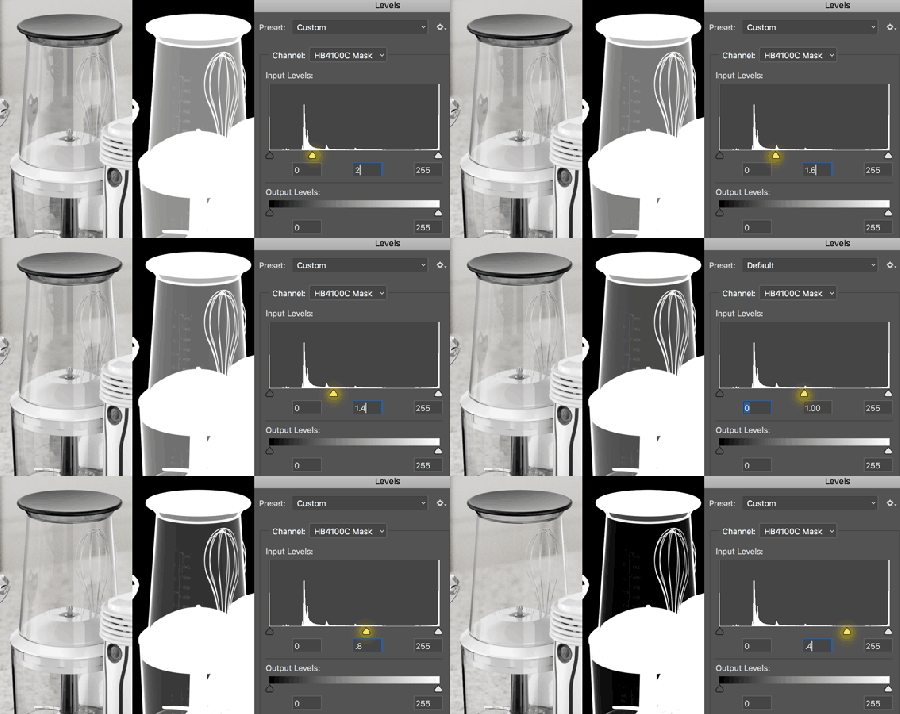
Having the transparency in the mask instead of the layer allows you to tweak the opacity with the mid-tone slider of a 'levels' adjustment.

levelstransparency.gif

Here is a scaled down version of this photoshop file : LayerExample.zip 14MB

Save as Jpeg Photoshop script by Greg Geffert

Everyday I need to create jpeg copies of my working Photoshop files to send out for review. A script that saves me a lot of mouse clicks is SaveasJpeg. Run this script and a jpeg copy with the same file name is saved in the same folder as the Photoshop file, without any dialog boxes popping up. If you make a change to the photoshop file the script will replace the old jpeg file, again without needless dialog boxes.

Download and uncompressed the file SaveasJpeg.zip. Put the script SaveasJpeg.jsx in the Photoshop/Presets/Scripts folder, then you can assign a shortcut key to its location in the File/Scripts menu. Two other similar scripts come along with it; SaveasTiff.jsx which does what the name says, and DialogSaveasJpeg.jsx which asks for a file name and location but then skips other dialog boxes.

I found this script online some years ago and haven't been able to relocate the origin to give proper credit, send me a note if you know. Using this one as a guide I created the other two, I hope you find them useful.


Vray to Photoshop Workflow by Greg Geffert

All renderings eventually end up in Photoshop for compositing. Vray elements are saved with the rendering as EXR files. These elements are opened in Photoshop as layers using an import plugin such as ProEXR or Exr-OI. Without the plugin Photoshop will still open the file but without the extra layers.

If you download and render out an EXR file from my 'Studio Scene File' post you’ll end up with a teapot rendering containing layers as seen on the right:

I modify these Vray elements to create separate ground reflection and shadow layers that are separate from the product teapot. Also, additional elements can be added to mask out objects, textures, or enhance elements like object reflections and refractions.

GGGphotoshopOpen.PNG

This ground plane technique is not perfect and there can be a small halo between the object and ground shadows. The halo can be quickly painted out in Photoshop though, and this single render pass setup is faster than the alternative of multiple passes for object, shadow, and reflection.

Here is the processed Photoshop file: StudioSceneTeapot.psd

GGGphotoshopProcessed.PNG

Production Studio Scene File 3dsMax/Vray by Greg Geffert

I've been working in 3D product visualization for a few years now, mostly working in 3dsmax with Vray and HDR Light Studio. Over this time I've developed and refined a template studio scene file that has cameras, lights, and standard render settings all setup in an effort to minimize the number of mouse clicks and keystrokes I need to get the end result. I import the 3D CAD file of the product, add textures, tweak the camera positions,  create the image files for the lights, and hit render to get all the image layers I'll need to finish the project in Photoshop.

If you're a 3dsMax & Vray user you're welcome to download it and try it yourself. Let me know what you think and how it could be improved. Download it here: StudioGGG.zip

StudioGGGscreen.PNG

The scene includes 6 cameras, each with a similar named HDR dome light used for that camera. these get updated with HDR Light Studio per project (a stand-in HDR file is provided for those without HDR Light Studio). There is a ground plane that is tied to specific render elements that separate the product from its ground shadow and reflection.

ggg_statesets.png

The state-sets feature is configured to render all camera/light combinations into corresponding files with a couple clicks.